Wi-Fi Navi App for iOS (iPhone & iPad) - Download to Boost Network Performance
In an era where connectivity drives productivity and entertainment, the demand for reliable network performance tools is at an all-time high. Whether you’re troubleshooting a slow Wi-Fi connection or optimizing your network setup, the Wi-Fi Navi app for iOS devices stands as a game-changer. Tailored for iPhone and iPad users, this app provides a suite of tools to test, analyze, and enhance your network performance. This guide delves into everything you need to know about downloading and using Wi-Fi Navi on iPhone & iPad devices.
Why Choose Wi-Fi Navi for iOS Devices?
Wi-Fi Navi is designed with user convenience in mind. For iPhone and iPad users, the app’s intuitive interface and robust features make it the ultimate choice for network diagnostics. Here are some reasons why Wi-Fi Navi is perfect for iOS devices:
Comprehensive Network Analysis: Perform detailed internet speed tests, analyze latency, and evaluate your connection reliability.
Seamless Integration: Optimized for iOS, Wi-Fi Navi ensures smooth functionality and compatibility with iPhones and iPads.
Enhanced Security: Identify and manage devices connected to your network to prevent unauthorized access.
Portable and Efficient: iOS devices paired with Wi-Fi Navi provide a portable, efficient solution for on-the-go network management.
Download Wi-Fi Navi App on iOS (iPhone & iPad) Devices
Getting Wi-Fi Navi on your iPhone or iPad is a straightforward process. Follow these steps:
Step 1: Open the App Store
Unlock your iPhone or iPad.
Tap on the App Store icon to launch Apple’s official app marketplace.
Step 2: Search for Wi-Fi Navi
In the search bar located at the bottom, type Wi-Fi Navi.
Tap the search icon or hit Enter to display the results.
Look for the app with the official logo and name, ensuring authenticity.
Step 3: Download the App
Tap on the app’s icon in the search results.
Click the Get button, followed by Install if prompted.
Authenticate the download using Face ID, Touch ID, or your Apple ID password.
Step 4: Wait for Installation
Once the download starts, a progress indicator will appear.
Wait for the app to install. It’ll be available on your home screen once complete.
Initial Setup for Wi-Fi Navi on iOS
After installing Wi-Fi Navi, you’ll need to configure it for optimal performance:
Step 1: Launch the App
Locate the Wi-Fi Navi icon on your home screen.
Tap to open the app.
Step 2: Grant Permissions
Wi-Fi Navi requires specific permissions to analyze your network. Grant the necessary permissions, such as:
Location Access: To map Wi-Fi coverage accurately.
Network Permissions: For detailed diagnostics and performance monitoring.
Step 3: Familiarize Yourself with the Interface
Spend a few minutes exploring the app’s features. Navigate through the main menu and submenus to understand its layout and functionality.
Key Features of Wi-Fi Navi on iOS
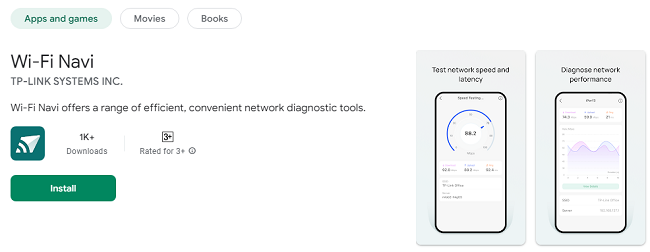
1. Speed Test
Measure your upload and download speeds with precision.
Check latency and jitter to ensure a stable connection.
2. Signal Strength Mapping
Identify areas in your home or office with weak Wi-Fi signals.
Optimize router placement for better coverage.
3. Device Management
Discover all devices connected to your network.
View their IP and MAC addresses, ensuring no unauthorized users are connected.
4. Ping and Trace Route
Diagnose connectivity issues by testing communication with specific servers.
Trace the path data packets take to reach their destination, identifying bottlenecks.
5. TCP/UDP Performance Testing
Evaluate the efficiency of your network using advanced protocol tests.
Pinpoint specific issues affecting data transmission.
Step-by-Step Guide to Using Wi-Fi Navi on iOS
1. Perform a Speed Test
Open the app and navigate to the Speed Test section.
Tap the Start Test button.
View real-time metrics for upload and download speeds, latency, and jitter.
2. Analyze Signal Strength
Navigate to the Signal Strength tool.
Walk around your space with your iPhone or iPad to identify weak signal areas.
Use the insights to reposition your router or add extenders.
3. Monitor Connected Devices
Access the Device Discovery feature.
View a list of all devices connected to your network.
Tap on individual devices for detailed information like IP addresses and activity.
4. Run Ping and Trace Route Tests
Go to the Diagnostics section and select Ping or Trace Route.
Enter the IP address or URL of the target server.
Tap Start and review the results to troubleshoot connectivity issues.
5. Conduct TCP/UDP Tests
Open the Performance Testing menu.
Choose between TCP and UDP tests based on your diagnostic needs.
Analyze the results to optimize your network.
Tips for Optimizing Wi-Fi Navi Usage on iOS
Update Regularly: Keep the app updated to access new features and improvements.
Run Diagnostics Periodically: Perform tests regularly to ensure consistent network performance.
Use Advanced Features: Leverage tools like Trace Route and TCP/UDP testing for in-depth analysis.
Secure Your Network: Monitor connected devices to detect unauthorized access.
Optimize Signal Coverage: Use signal strength mapping to enhance Wi-Fi coverage in your space.
Troubleshooting Common Issues with Wi-Fi Navi on iOS
1. App Not Downloading
Check your internet connection.
Ensure sufficient storage space is available on your device.
2. Permissions Denied
Navigate to Settings > Wi-Fi Navi > Permissions and enable necessary permissions like Location and Network.
3. Inaccurate Test Results
Ensure no heavy downloads or streaming activities are ongoing during tests.
Restart your router and run the test again.
4. App Crashes
Close the app and reopen it.
Update the app to the latest version via the App Store.
Benefits of Using Wi-Fi Navi on iOS Devices
1. Enhanced User Experience
The app’s iOS-optimized interface ensures seamless navigation and usability.
2. Reliable Diagnostics
Access precise and actionable insights to troubleshoot connectivity issues.
3. Time and Cost Savings
Avoid unnecessary technician visits by diagnosing and resolving issues independently.
4. Improved Network Security
Monitor and manage connected devices to safeguard your network.
5. Versatility
Suitable for home networks, business setups, and on-the-go diagnostics.
Why Wi-Fi Navi is Essential for iPhone and iPad Users?
In the realm of iOS apps, Wi-Fi Navi is a standout choice for network diagnostics and optimization. Its ability to provide detailed insights, combined with ease of use, makes it an invaluable tool for both casual users and professionals. From speed testing to security monitoring, Wi-Fi Navi equips you with everything you need to master your network.
Conclusion
The Wi-Fi Navi app for iOS devices is a comprehensive solution for diagnosing and optimizing network performance. With its intuitive interface and powerful features, it transforms your iPhone or iPad into a portable network management tool. Whether you’re a tech-savvy professional or a casual user, Wi-Fi Navi simplifies the complexities of network diagnostics, ensuring you stay connected seamlessly.
Download Wi-Fi Navi today and experience unparalleled control over your network’s performance!
Updates