Wi-Fi Navi on Windows PC: Install, Setup, & Optimize Your Network
In today's connected world, having a reliable and high-speed Wi-Fi network is crucial for activities like browsing the internet, streaming videos, online gaming, and even remote work. If you're facing issues like slow internet speeds, high latency, or weak signal strength, diagnosing and optimizing your Wi-Fi network is essential. The Wi-Fi Navi app offers a comprehensive solution for network diagnostics, providing tools like speed tests, device management, latency checks, and signal strength analysis.
While Wi-Fi Navi is primarily known for its mobile versions on Android and iOS, you can also use it on a Windows PC. If you're wondering how to download, install, and use Wi-Fi Navi on your Windows computer, this guide will walk you through the process step by step.
Why Use Wi-Fi Navi on Your Windows PC?
Before diving into the technical aspects, let’s take a look at why Wi-Fi Navi is a great choice for managing your Wi-Fi network on a Windows PC:
Comprehensive Network Diagnostics: Wi-Fi Navi allows you to perform speed tests, analyze latency, identify connected devices, and measure signal strength—essential tools for optimizing any Wi-Fi network.
Easy to Use: The app is designed with a user-friendly interface, making it accessible to both tech-savvy users and beginners.
Free of Charge: Wi-Fi Navi is completely free, offering premium features without any hidden costs or subscriptions.
Multi-Device Support: While it’s available on mobile devices, Wi-Fi Navi can be easily installed on your Windows PC using an emulator, giving you access to the app on larger screens with better control.
Now, let’s explore how to get Wi-Fi Navi up and running on your Windows PC.
Steps to Download Wi-Fi Navi App on Your Windows PC
Step 1: Download and Install an Android Emulator on Your Windows PC
Wi-Fi Navi is not natively available for Windows PCs, but with the help of an Android emulator, you can easily run the app on your computer. An emulator essentially creates a virtual Android environment on your Windows PC, allowing you to download and use Android apps.
Here’s how to get started:
1.1 Choose an Android Emulator
Some of the most popular Android emulators for Windows include:
BlueStacks: A widely used emulator known for its speed and ease of use.
Nox Player: Another popular emulator, especially for gaming, but it also works well for apps like Wi-Fi Navi.
MEmu: A lightweight emulator designed for performance and low resource consumption.
In this guide, we’ll walk you through using BlueStacks, as it’s one of the most reliable and user-friendly emulators.
1.2 Download BlueStacks
Go to the official BlueStacks website: www.bluestacks.com.
Click on the Download BlueStacks button to download the installer.
Once the file is downloaded, double-click on the installer to start the installation process.
Follow the on-screen instructions to complete the installation. BlueStacks will ask for some permissions, including access to your system files—allow these to ensure proper functionality.
1.3 Install BlueStacks on Your Windows PC
Once BlueStacks is installed, launch the application. The emulator will load, and you’ll be prompted to sign in with your Google account (just like on an Android phone).
If you don’t have a Google account, you can create one directly from BlueStacks.
Step 2: Download Wi-Fi Navi App from Google Play Store
Now that you have BlueStacks set up, you can download Wi-Fi Navi and start using it on your Windows PC.
2.1 Open the Google Play Store
Inside the BlueStacks interface, find and open the Google Play Store icon.
Sign in with your Google account if you haven’t already. This step is necessary to access apps from the Play Store.
2.2 Search for Wi-Fi Navi
In the Play Store search bar, type “Wi-Fi Navi” and press Enter.
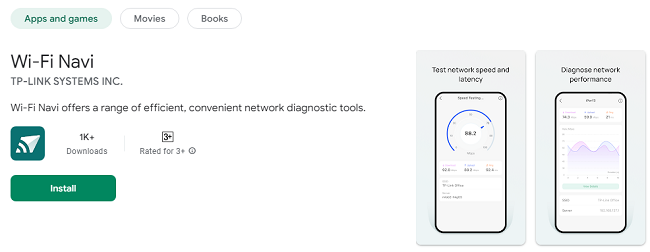
Look for the correct app, titled “Wi-Fi Navi: Network Diagnostics & Speed Test” by the developer Wi-Fi Navi.
2.3 Install Wi-Fi Navi
Click on the Install button next to the Wi-Fi Navi app.
Wait for the app to download and install. This may take a few moments, depending on your internet speed.
Step 3: Set Up Wi-Fi Navi on Your Windows PC
Once Wi-Fi Navi is installed on your emulator, it’s time to set it up and start using its powerful network diagnostics features.
3.1 Launch Wi-Fi Navi
After installation, click on the Wi-Fi Navi icon in the BlueStacks interface to open the app.
The app will open just like it would on an Android phone, allowing you to use all of its features on your Windows PC.
3.2 Allow Necessary Permissions
Wi-Fi Navi may ask for certain permissions, such as access to your device’s network data. Grant these permissions to ensure that the app can analyze your Wi-Fi network properly.
You might also be prompted to enable location services for better accuracy with signal strength mapping and device discovery.
Step 4: Use Wi-Fi Navi’s Key Features
Now that Wi-Fi Navi is installed and running on your Windows PC, let’s explore its key features and how to use them effectively.
4.1 Run a Speed Test
Wi-Fi Navi’s speed test feature helps you measure your internet’s download speed, upload speed, and latency (ping).
Open the Wi-Fi Navi app on BlueStacks.
On the home screen, tap the Speed Test button.
Wait for the app to begin the speed test. It will connect to a nearby server and measure your connection’s performance.
Once the test is complete, the app will display your download and upload speeds, as well as your ping latency.
Use this tool regularly to monitor your internet speed and troubleshoot any connectivity issues.
4.2 Check Network Latency
Latency can significantly affect the performance of online games, video streaming, and video conferencing. Wi-Fi Navi’s ping test helps you measure latency to different servers.
Go to the Ping Test section in the app.
Enter the address of a server you want to ping (such as 8.8.8.8, Google’s public DNS server).
Tap Start, and the app will measure the time it takes for data to travel between your device and the server, displaying the round-trip time (ms).
4.3 Discover Devices on Your Network
Wi-Fi Navi lets you identify and manage the devices connected to your Wi-Fi network. This feature is particularly useful for finding unauthorized devices or optimizing bandwidth usage.
In the Wi-Fi Navi app, open the Device Discovery tool.
The app will scan your network and list all the connected devices.
You’ll see details like the IP address, MAC address, and device name.
If there are devices consuming too much bandwidth, you can take action by disconnecting or limiting their access.
4.4 Analyze Wi-Fi Signal Strength
Wi-Fi Navi includes a signal strength mapping feature that allows you to visualize your Wi-Fi coverage. This is useful for identifying areas in your home or office with weak signals.
Open the Signal Strength Mapping tool in Wi-Fi Navi.
Walk around your space while keeping an eye on the signal map.
The app will provide a heatmap showing areas with strong or weak signal coverage, helping you pinpoint areas for router placement or range extender installation.
4.5 Perform a Trace Route
For advanced users, Wi-Fi Navi also offers a Trace Route tool to diagnose issues along the path data takes from your device to a destination server.
Open the Trace Route section in the app.
Enter the address of a server you want to trace.
The app will show you the complete path data travels, including each hop and the time taken for each part of the journey.
This feature is useful for diagnosing network congestion or routing issues caused by your Internet Service Provider (ISP) or external servers.
Step 5: Optimize and Troubleshoot Your Wi-Fi Network
Wi-Fi Navi also offers several optimization tips based on your diagnostic results. Here are a few common steps you can take to improve your Wi-Fi network:
Reposition Your Router: Use the signal strength map to find areas with weak coverage. Moving your router to a central location can improve overall coverage.
Change Channels: If you're experiencing interference, use the network analysis tool to check which Wi-Fi channel is least congested and switch to it.
Limit Bandwidth Hogging Devices: Identify high-traffic devices using the device discovery tool and consider disconnecting or limiting their bandwidth usage.
Upgrade Your Hardware: If your Wi-Fi speeds are consistently slow, it might be time to upgrade your router or modem to support faster speeds.
Conclusion
By following this step-by-step guide, you can easily download and use the Wi-Fi Navi app on your Windows PC via an Android emulator. Whether you're troubleshooting slow speeds, checking for latency issues, managing connected devices, or analyzing signal strength, Wi-Fi Navi provides all the tools you need to optimize your Wi-Fi network.
Take full advantage of the app’s diagnostic features to ensure that your network is performing at its best, providing you with a faster, more reliable internet connection. Start using Wi-Fi Navi today to enhance your online experience!
Updates